
How to Replace Halogen Bulbs With LED
Table of Contents
- Why Replace Halogen Bulbs With LED
- LED Bulb Compatibility Guide
- LED Colour Temperature Explained
- Dimmable LED Light Switches and Compatibility
- What You’ll Need Before You Start
- Step-by-Step Replacement Process
- Common Issues and Troubleshooting
- Conclusion
- Frequently Asked Questions
Last Updated: October 1, 2026
Why Replace Halogen Bulbs With LED
Halogen bulbs waste energy. They run hot, dim over time, and need replacing every couple of years. When you replace halogen bulbs with LED, the alternatives last far longer, use a fraction of the power, and produce less heat in your home.
The switch makes financial sense. You’ll notice lower electricity bills almost immediately. More importantly, you won’t be climbing a ladder every few months to swap out dead bulbs.
Safety matters too. Halogen bulbs get extremely hot to the touch. If you have children or pets, that’s a real hazard. LEDs stay cool, which also means they’re safer to handle when replacing them.
The main concern people raise is compatibility. Not every LED bulb fits every halogen fitting. That’s why understanding your current setup before you buy is essential.
LED Bulb Compatibility Guide
Before you spend money on new bulbs, you need to know what will actually fit in your light fittings. Buying the wrong type is frustrating and wasteful.
Checking Your Current Fitting Type
Look at your halogen bulb right now. You’ll see it has a base, the part that screws or clicks into the fitting. That base type determines which LED replacements will work.
Common halogen base types include GU10, MR16, G9, and E14. Each one is different, and an LED made for one type won’t fit another.
To find your base type:
- Look at the bulb itself, the type is usually printed on it
- Check your light fitting for any markings
- If you’re still unsure, take a photo and ask a local electrician or visit a retailer like Ledlam who can help identify it
Most ceiling downlights use GU10 fittings. Smaller decorative lights often use G9. If you’re not certain, don’t guess. A quick phone call or visit to a local supplier saves time and money.
Understanding Base Types and Sizes
Different bases serve different purposes. Understanding them helps you choose correctly.
GU10 is the most common type in kitchens and living rooms. It has two small pins that push straight in and twist to lock. These fittings are standard in most modern homes.
MR16 bulbs are smaller and often used in accent lighting or under-cabinet fixtures. They also have two pins but are narrower than GU10.
G9 is a compact base with two coils. You’ll see these in wall lights, table lamps, and some pendant fittings.
E14 and E27 are screw-in bases. E14 is smaller (used in candle-style bulbs), while E27 is the standard household bulb you’ve probably used for years.
If you’re replacing halogen bulbs with LED, match the base type exactly. An LED with the right base will fit smoothly and work reliably.
LED Colour Temperature Explained
Colour temperature affects how a room feels. It’s measured in Kelvin (K), and it matters more than most people realise.
Warm white (2700K) looks like traditional incandescent light. It’s cosy and relaxing. Use this in bedrooms, living rooms, and anywhere you want a comfortable atmosphere.
Neutral white (4000K) sits in the middle. It’s bright without being harsh. This works well in kitchens, bathrooms, and work areas where you need good visibility.
Cool white (6500K) is bright and clinical. It mimics daylight and is useful in garages, workshops, and spaces where precise visibility matters.
When you replace halogen bulbs with LED, check the colour temperature of your old bulbs. Halogen typically produces warm light around 3000K. If you want the same feel, choose an LED rated at 2700K or 3000K.
Many people make the mistake of buying whatever LED is cheapest, then complain the light feels wrong. The bulb itself might be fine, it’s just the wrong colour temperature for that space.
Dimmable LED Light Switches and Compatibility
This is where many replacements fail. Older dimmer switches don’t always work with LED bulbs, causing flickering or refusing to dim at all.
Halogen bulbs are dimmable by default. Most LED bulbs are not, unless they’re specifically marked as dimmable. This is crucial.
If you have a dimmer switch, you must buy dimmable LEDs. A standard LED on a dimmer switch will either flicker constantly or not dim properly. It’s frustrating and usually means the bulb fails prematurely.
Check your light switch. If it has a sliding dimmer or a rotary dial, you’re using a dimmer. When you buy LED replacements, look for “dimmable” on the packaging.
Some older dimmer switches are incompatible with LEDs even if the bulbs are dimmable. This is rare, but it happens. If you install dimmable LEDs and they still flicker, your dimmer might be one of the older types that needs replacing. An electrician can advise on this, or you can contact Ledlam for guidance on compatible products.
What You’ll Need Before You Start
Gather these items before you begin the replacement process.
Essential items:
- Your new LED bulbs (correct base type and dimmable rating)
- A stable stepladder or step stool
- A dry cloth or soft gloves (halogen oil residue can damage LED bulbs)
Optional but helpful:
- A torch or headlamp (ceiling work is easier with good light)
- A notepad to record which bulbs go where
- Your old halogen bulb (to confirm the base type if you’re unsure)
Don’t skip the cloth or gloves. Halogen bulbs leave an oily residue on their bases. If you touch the LED bulb with bare hands, that residue transfers to the new bulb and can cause premature failure.
Step-by-Step Replacement Process
The replacement itself is straightforward. Take your time and follow each step in order.
Step 1: Turn Off the Power
This is non-negotiable. Switch off the light at the wall switch, then switch off the circuit breaker for that room if you know which one it is.
Wait a moment. Even though LEDs run cooler than halogen, the fitting itself may still be warm from the old bulb. Give it time to cool.
Step 2: Remove the Halogen Bulb
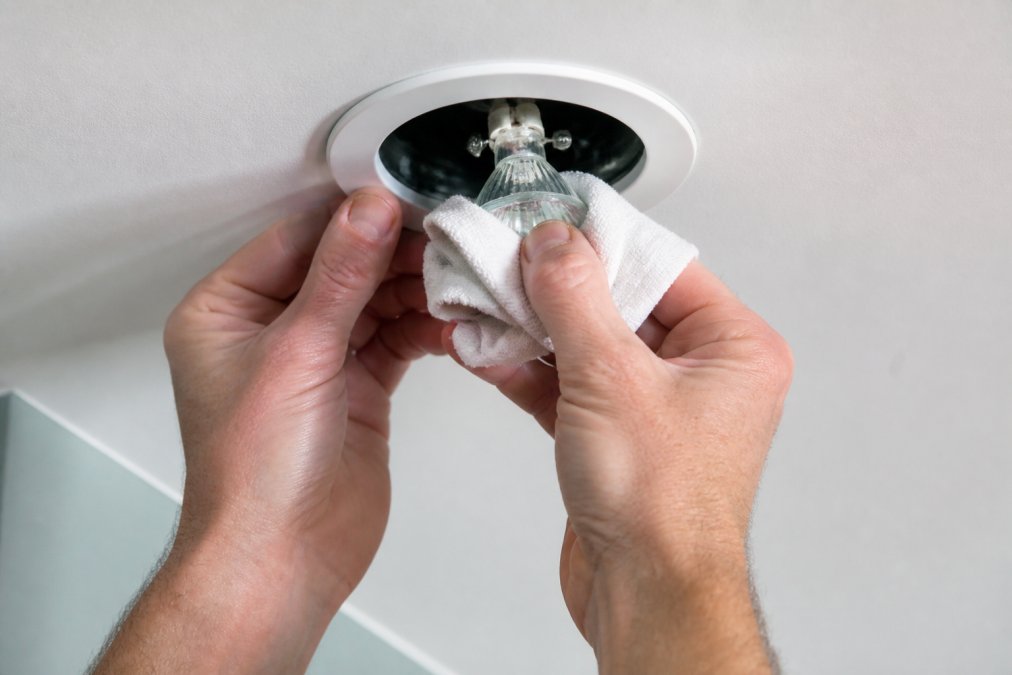
Use your cloth or gloves to grip the old bulb. Never touch it with bare hands, the oils from your skin damage the halogen bulb and can transfer to the new LED.
For GU10 bulbs, push gently inward and twist anticlockwise. The bulb will release and slide out.
For MR16 or other pin-based bulbs, push gently and twist the same way.
For G9 bulbs, pull straight out with a gentle rocking motion.
Place the old bulb somewhere safe. Don’t drop it, halogen bulbs are fragile and can shatter.
Step 3: Install the LED Bulb
Still wearing your cloth or gloves, take the new LED bulb and insert it into the empty fitting.
For GU10, align the pins and push gently inward, then twist clockwise until it clicks.
For MR16, follow the same process: align, push, twist.
For G9, insert straight in and push until it seats fully.
Don’t force anything. If the bulb doesn’t slide in smoothly, check that you have the right base type. Forcing a mismatched bulb damages both the bulb and the fitting.
Step 4: Switch the Power Back On and Test
Turn the circuit breaker back on, then flip the light switch.
The LED should light immediately. Halogen bulbs took a moment to warm up; LEDs are instant.
If you have a dimmer switch, test it. The light should dim smoothly from full brightness to low. If it flickers or doesn’t dim, see the troubleshooting section below.
Let the light run for a few minutes. Check that it’s producing the light level and colour you expected.
Common Issues and Troubleshooting
Most replacements work perfectly. When they don’t, the cause is usually straightforward.
The LED won’t light at all.
Check that you’ve turned the power back on. Confirm the bulb is fully inserted and twisted tight. If it still won’t light, try a different LED in that fitting. If the new bulb works, the old one was faulty. If no LED works in that fitting, the fitting itself may be damaged. Contact an electrician to inspect it.
The LED flickers.
This almost always means the LED is on a dimmer switch and isn’t dimmable. Replace it with a dimmable LED. If you’ve already done that and it still flickers, your dimmer switch may be incompatible with LEDs.
The light is too bright or too dim.
The LED looks a different colour from the halogen.
The LED lasts only a few months.
Conclusion
Replacing halogen bulbs with LED is simple once you know your fitting type and understand colour temperature and dimmer compatibility. The process takes minutes per bulb, and the savings in energy and replacement frequency add up quickly.
Frequently Asked Questions
Are LED bulbs compatible with existing halogen light fittings?
Most LED bulbs are compatible with standard halogen fittings, but you need to check the base type (GU10, MR16, E27, etc.) and wattage rating. LED bulbs produce the same light output as higher-wattage halogens, so a 5W LED often replaces a 50W halogen. Always verify the fitting size and check the product specifications before purchasing. Ledlam’s LED range includes detailed compatibility information for each bulb type.
Can I replace dimmable halogen bulbs with LED bulbs?
Yes, but you need dimmable LED bulbs and a compatible dimmer switch. Not all LED bulbs work with older dimmer switches designed for halogen. If your lights flicker when dimmed, your dimmer may not be compatible. Modern dimmable LED light switches and bulbs are designed to work together. Test a single bulb first, or contact Ledlam for advice on which dimmable LEDs suit your existing switches.
What colour temperature should I choose when replacing halogen bulbs?
Halogen bulbs typically produce warm white light around 2700K-3000K. Choose LED bulbs in the same colour temperature range for a familiar appearance. Warm white (2700K) suits living rooms and bedrooms; cool white (4000K) works better for kitchens and workspaces. Colour temperature is measured in Kelvin (K) and affects how natural or clinical the light feels. Check the product packaging or ask Ledlam for recommendations based on your room type.
Do I need an electrician to replace halogen bulbs with LED?
No. Replacing bulbs is straightforward if you switch off the power first. Simply remove the old halogen and insert the new LED. However, if you need to change dimmer switches or rewire fittings, consult a qualified electrician. Always turn off the power at the wall before handling any bulb to avoid electrical shock. If you’re unsure about your specific setup, Ledlam can help you identify the right products and advise on installation.